Leaking Shower Head? Here’s What You Need To Do!
A leaking shower head is annoying. It wastes a lot of water, and if it happens long-term, your bathroom can be a home to mould. Keep yourself from high water bills and the possibility of mould with these easy yet highly effective instructions in fixing a leaking shower head.
Why Fix a Leaking Shower Head?
If water leaking from the shower head is enough to wake you up at night, your utility bills are getting more and more expensive, or a lot of water is leaking when you’re in the shower, you need to consider calling for professional help. If you let the problem go on for long, you can really lose a lot of money in utilities; money that you could’ve used for more important things or pay for a professional plumbing service. A leaking shower head can also leave your bathroom prone to corrosion and stains.
Fixing a leaking shower head isn’t that difficult as it doesn’t require special tools and skills, especially if the case isn’t that severe. However, if it’s leaking even when not in use, you need professional help because it may be caused by other problems, such as high water pressure.
How to Fix the Leaking Shower Head?
Of course, if you can, it’s still wise to try your best to fix the problem on your own because it can save you on service fees needed to hire a professional plumbing service.
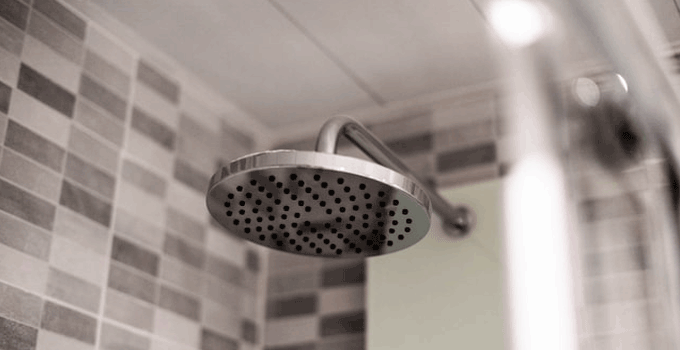
Soak the Showerhead in Vinegar
If you’ve been using your shower head for a long time now, your leaking problem might be due to the fact that hard water deposits have built up in the holes of the shower head. These deposits can block the water from coming out of the shower head, which can make the water find another way out, leading it to leak out of the back of the shower head. If hard water continues to form on the shower head, the leak will get stronger over time, which is why you need to take care of it as soon as possible.
To solve it, remove the shower head by loosening the nut that attaches it to the shower arm. Vinegar is an effective substance in removing hard water deposits, which is why you need to soak the shower head overnight. After that, scrub the remaining hard water deposits from the shower head. Once you’re done, you can reinstall it again.
Check if the Seal is Worn
Shower heads are sealed using washers and O-rings to form a watertight seal. However, over time and repeated use, the seal can start to loosen or get worn out. When gaps start to appeal in the seal, water will find its way out of these gaps, leading to leaks.
If your showerhead is sealed with a swivel connection, it may be the cause of your problem as they use a seal behind the swivel. If you think this is the cause of the problem, it’s easy to solve. Seals are cheap; you just need to bring the old one to the hardware store to ensure you buy an exact match. Then, remove the showerhead, replace the washer or O-ring, and assemble it again to see if the leak is gone.
Replace the Compression Faucet’s Washer if it’s still Leaking
If you use a compression faucet, you would know that it has two handles, one hot and the other cold. If your compression-style faucet is still leaking even when you’ve done the steps above, it can be due to a worn washer in your shower’s assembly.
To ensure that you’ll be fixing things right, you need to find out which handle is causing the leak. It’s not that hard. You just need to feel the leaking water if it’s hot or cold. Once you determine the source, turn off the water supply. Then, remove the faucet handle, take off the cover trim to see the faucet stem secured by a hex nut. Get a deep socket wrench and remove the nut so you can take the rubber washer off. Finally, replace the broken washer and reassemble everything.
If it doesn’t work, you can also check the curved area behind the washer, as it may be corroded and won’t allow the washer to be sealed. If it’s the case, you’re better off calling your plumber.
Check for a Broken Cartridge in the Valve Body
If your shower uses a single handle for both hot and cold water, you need this. Your shower has a valve body in the wall behind the handle, which has a hard plastic cartridge. When the cartridge is broken, water can leak.
First, turn off the water supply, remove the handle to access the cartridge, then remove the faceplate and cap. After that, remove the stem cover to find the plastic cartridge. Remove the clip or nut securing the cartridge and use pliers to pull it out. After that, you can take the original cartridge to the hardware store to buy a perfect match. Finally, replace the cartridge and assemble everything again.
Finally
Should the showerhead continue to leak, you might need to call your plumber to replace the entire valve body.
A leaking shower can be really annoying, especially because different manufacturers make them different, and it takes different steps to work with each one. It’s why you need to make sure that you have a leaking shower repair Perth service provider to help you when the problem becomes too much.

How to Purify Borewell Water for Your Daily Usage At Home?

Six Tips For Picking A Ozark Storage Unit That Fits Your Needs
